Walking Sticks Plans
Walking Sticks Plans
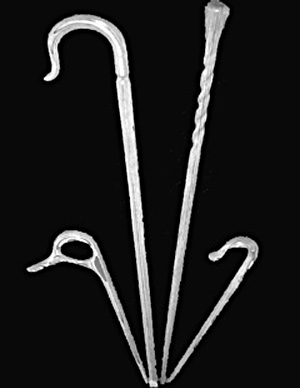
A relatively easy plan for the beginner woodworker, these walking sticks make wonderful gifts. The designs shown are simply ideas to get you started. Your design can be as simple or as intricate as your skills and confidence allow.
Materials:
Angle Grinder: Suitable 4 inch (100mm) or 4-1/2 inch (115mm) angle grinder
Wood: 2 pieces of ply wood 19 X 400 X 1000mm for sticks or 19 x 400 x 2000mm for staffs.
Glue: White P.V.A.
2-4 F Clamps
Sand Paper For Finishing
Finish: Options inlude a wax polish or brush applied varnish by choice.
Safety: Safety glasses, ear plugs, dust mask & close fitting clothes.
METHOD
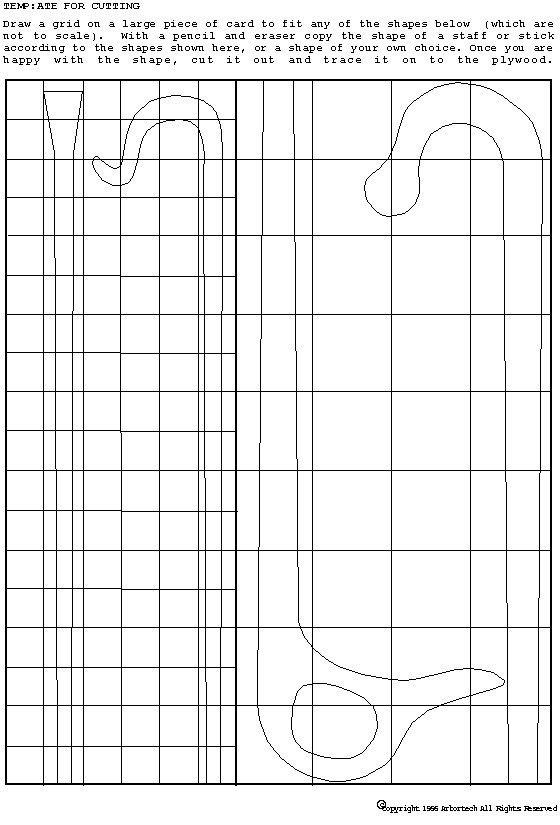
At the bottom of this page are scaled instructions to create a card template of various walking sticks and staffs. All of which can be made as shown below. cut it out and trace it on the wood to create an identical walking stick or staff shape. To skip drawing a template you may draw a shape directly onto the wood.
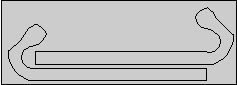
1. FIG 1 shows the lay up cutting plan a of basic walking stick. The basic outline is traced from a template. The shapes are cut out from the 19mm plywood with a jig saw, to the near finished shape. Solid wood may be used but for strength any curves must follow the natural grain.
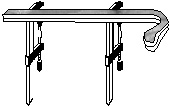
2. Glue the two pieces of wood as shown in FIG 2 using the F clamps ie. 2 X 19mm = 38mm thick.
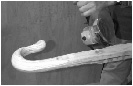
3. Once the glue has dried, then the sqared edges can be rounded using the Arbortech Woodcarver or Industrial Woodcarver.
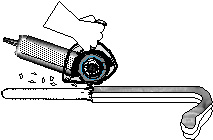
4. The Arbortech flexible grinder sanding disk is used towards the end of shaping and is used to cut away all the tool marks and allow you to fine shape and adjust the final profiles. After 40 grit, use 80 grit and then hand sand.
5. To obtain a good finish, first seal the pores of the wood with either a cellulose or oil sealing compound. They are called grain sealers and obtainable from woodworking suppliers. Apply a generous coat with a rag. Allow this to dry and sand lightly with a fine sand paper. Apply another sparing coat of sealer with a rag, allow to dry. Apply polish or varnish finish.
Materials:
Angle Grinder: Suitable 4 inch (100mm) or 4-1/2 inch (115mm) angle grinder
Wood: 2 pieces of ply wood 19 X 400 X 1000mm for sticks or 19 x 400 x 2000mm for staffs.
Glue: White P.V.A.
2-4 F Clamps
Sand Paper For Finishing
Finish: Options inlude a wax polish or brush applied varnish by choice.
Safety: Safety glasses, ear plugs, dust mask & close fitting clothes.
METHOD
At the bottom of this page are scaled instructions to create a card template of various walking sticks and staffs. All of which can be made as shown below. cut it out and trace it on the wood to create an identical walking stick or staff shape. To skip drawing a template you may draw a shape directly onto the wood.
1. FIG 1 shows the lay up cutting plan a of basic walking stick. The basic outline is traced from a template. The shapes are cut out from the 19mm plywood with a jig saw, to the near finished shape. Solid wood may be used but for strength any curves must follow the natural grain.
2. Glue the two pieces of wood as shown in FIG 2 using the F clamps ie. 2 X 19mm = 38mm thick.
3. Once the glue has dried, then the sqared edges can be rounded using the Arbortech Woodcarver or Industrial Woodcarver.
4. The Arbortech flexible grinder sanding disk is used towards the end of shaping and is used to cut away all the tool marks and allow you to fine shape and adjust the final profiles. After 40 grit, use 80 grit and then hand sand.
5. To obtain a good finish, first seal the pores of the wood with either a cellulose or oil sealing compound. They are called grain sealers and obtainable from woodworking suppliers. Apply a generous coat with a rag. Allow this to dry and sand lightly with a fine sand paper. Apply another sparing coat of sealer with a rag, allow to dry. Apply polish or varnish finish.