
Custom Crocheted Beret Pattern
Custom Crocheted Beret Pattern
Materials List
about 4oz of yarn to make a hat.
Hook depends on size of yarn. If you're going to use a worsted weight then an F or G hook would work
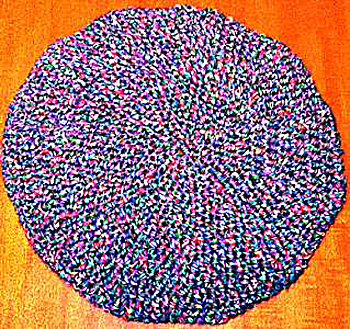
An average sized Beret will be about the size of a dinner plate, but you can make it bigger or smaller.
DESIGNER'S NOTES: This pattern is a basic cap formula. Therefore, you can vary it to suit your own needs. You can change the hat by adding stripes of color or another yarn, like Mohair or a Boucle For texture. Try crocheting through only the inside loop for a ribbed texture.
The size of your yarn and hook will affect the way your hat looks. If it looks ruffly, start with fewer than 9 stitches or try a smaller hook. If it starts to form a cone, use more than nine stitches or try a larger hook.
INSTRUCTIONS:
Starting with the center top of the hat, chain 5. Join the chain with a slip stitch so that you have a ring.
Row 1: Chain 2 and count this as your first stitch. work 9 stitches in the ring. (I like to work hats in half double crochet, but you can use single or double depending on the yarn and what effect you want to achieve--JS) Join last stitch to first with a slip stitch.
Row 2: Chain 2. Counts as first st. Work one stitch in same stitch as joining, then 2 stitches in each stitch around. Join to top of chain 2.
Row 3: Chain 2, one stitch in first stitch, two stitches in the next stitch (Increase by one stitch every other stitch. Do this all the way around) join as in row 1.
Row 4: Chain 2, crochet around Making 2 stitches in every 3rd stitch (increase made), one stitch in the stitches in between. Join to top of chain 2
Row 5: Chain 2, increase every 4th stitch, Join to the top of chain 2
End All rows by joining to the top of chain 2
Row 6: increase every 5th stitch.
You will be increasing at a rate of 9 stitches every row; Every 6th stitch on row 7, Every 7th stitch on row 8 and so on. This will make the top of your hat.
Keep increasing the top of the hat until you are increasing about every 15th of 16th stitch.
NOTE: An average sized Beret will be about the size of a dinner plate, but you can make it bigger or smaller.
When it looks right, Crochet one row (no increases). On the next row, decrease by skipping a stitch as many times as you increased on your last increase row. For example, if you stopped increasing at every 15th stitch, you will want to start decreasing every 15th sitich. The next row will be every 14th stitch, then every 13th stitch and so on until the Beret fits snugly - not too tightly or it will be uncomfortable.
Now, crochet a few rows around without increasing or decreasing. This will be your hat band. End with a slip stitch and weave in the end.
